Pre-requisites:
- Intro to Spatial Data
- Data Collection
Objectives:
- Understanding how to wrangle or prepare your data
- Recognize common methods to sptail data wrangling
Exercise: Wrangling vector and raster data
Data Formatting
Data manipulation can be a simple endeavour if the data inputs come in the same or compatible formats. Data sources will usually have a specific format they use for their data which can make it easy to use work with their datasets. Unfortunately, when we gather data from various sources, we are usually given several different formats to data to deal with. Data wrangling is the process of manipulating and reformatting disparate data sources into compatible datasets. Data wrangling makes proper analysis/modeling possible. There are several methods common to spatial data wrangling some of which are:
- Reprojection - Conversion from one projection coordinate system to another
- Rasterization/Vectorization - Conversion from raster dataset to vector and vice versa
- Extent Definition - Delineates the bounding box for a dataset, all data outside the box will become null
- Reclassification - Assigns categorical values to a field based on a the contained values
- Spatial Joins - Merges datasets based on spatial proximity/overlay
These methods can be performed using a variety of tools depending on the specific needs of the dataset.
Exercise
This next simple data wrangling exercise will walk through extracting a feature from a shapefile and reprojecting (warpping) a raster. Two commonly used processes when working with spatial data.
- Open QGIS and set projection projection to EPSG:2927:
As a reminder, before starting any project in a GIS program, you should first set the project projection to make sure your data comes in with the same extent.
If you don't set the project's projection, the program will use the projection of the first layer added or in the case for QGIS, EPSG:4326.
Project CRS: Menu Bar > Project Properties > CRS
Enable 'on the fly' CRS transformation. Search for 2927.
Select NAD83(HARN) / Washington South (ftUS) EPSG:2927 and click APPLY then OK.
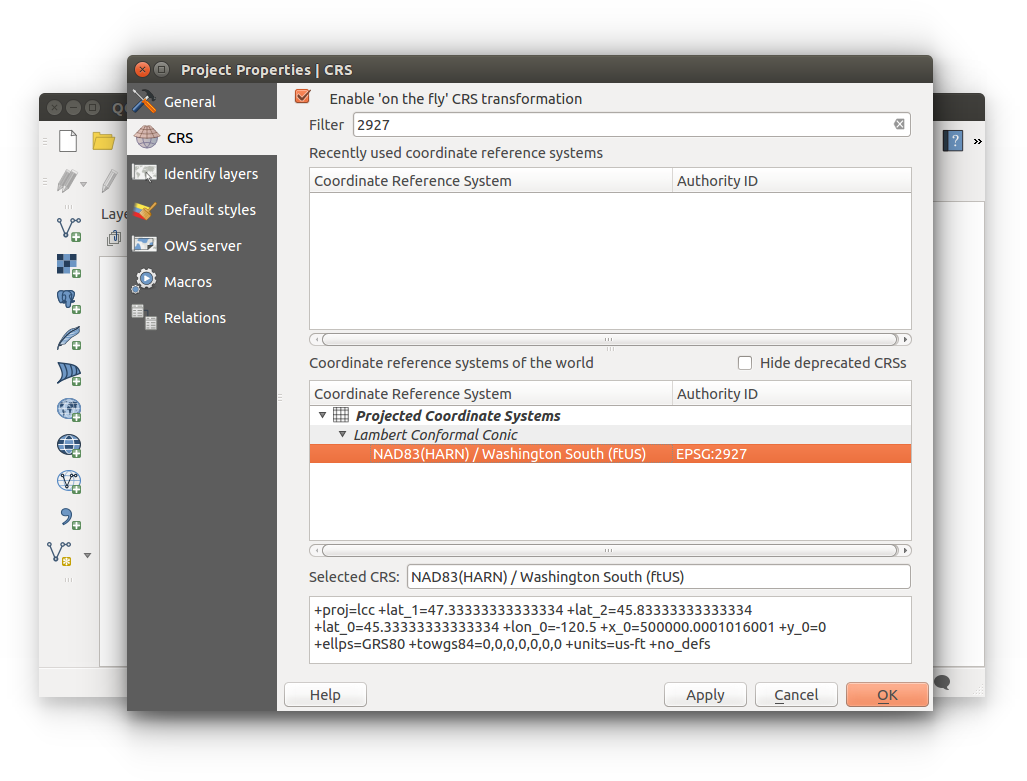
- Import US states shapefile:
- iRods access:
/iplant/home/shared/aegis/Spatial-bootcamp/data-hygiene/data-formatting/USA_adm1.shp
Or download here, unzip, and Add Vector Layer :
:
USA_adm1.zip
You should now be viewing the US states boundaries in EPSG:2927:
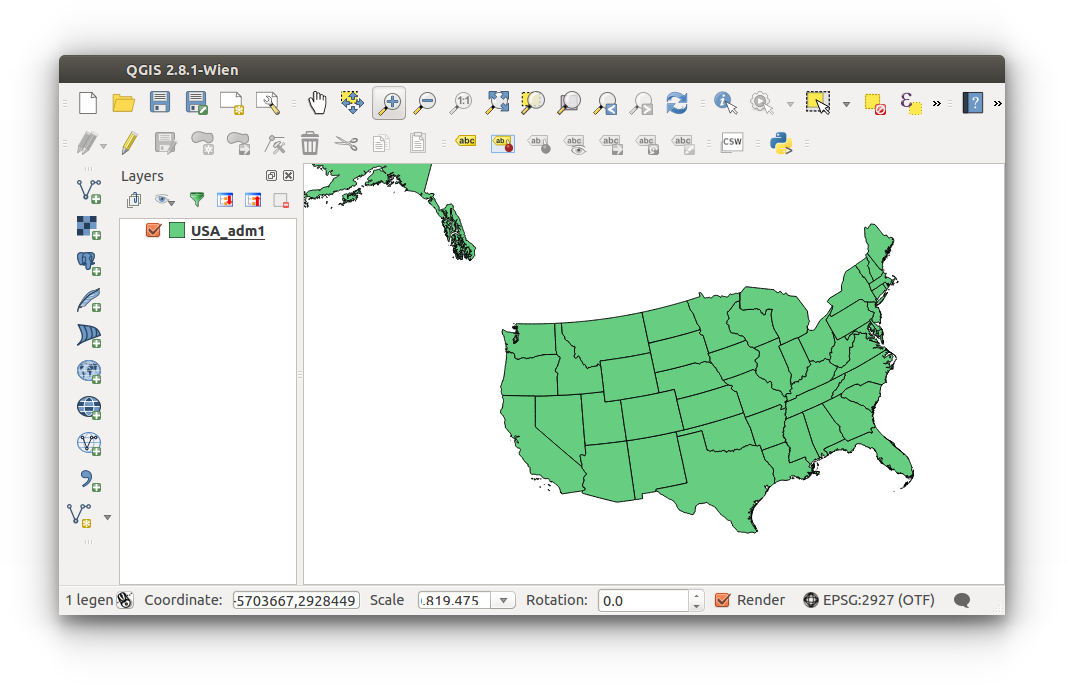
- iRods access:
- Extract Washington state boundary:
Since our project is directed at the state of Washington. We should extract the Washington state boundary for our study. The GADM[^7] project provides high-quality boundary data on country, state, and county levels. We can use the US-state level dataset to get the Washington boundary.
- Enable Select Feature tool: Meun Bar > View > Select > Select Single Feature. Or =, click on Select Features by area or single click tool
 and click on Washington to add to our selection.
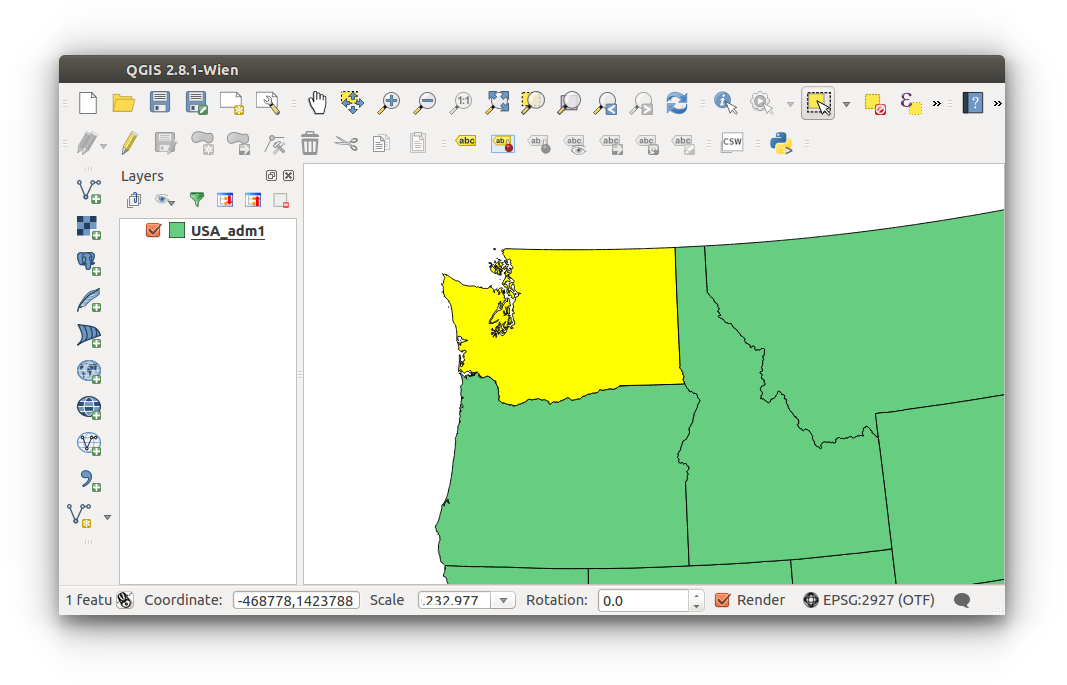
-
Right click USA_adm1 (layer list) > Save As...
- Format: ESRI Shapefile
- Save as: washington.shp
- CRS: Browse > NAD83(HARN)/Washington South (ftUS) EPSG:2927
- Encoding: UTF-8
- Save only selected feature: (checked)
- Add saved file to map: (checked)
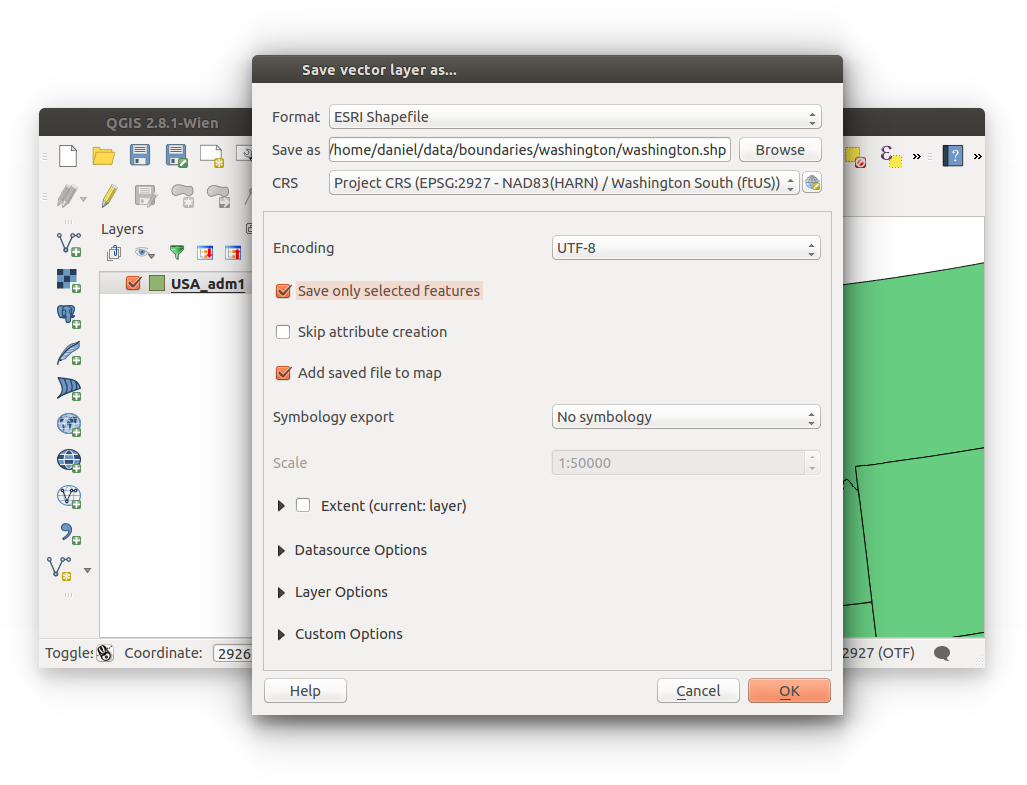
- Enable Select Feature tool: Meun Bar > View > Select > Select Single Feature. Or =, click on Select Features by area or single click tool
- Remove USA_adm1 layer from the project:
We no longer need the entire USA boundaries now that we have extracted Washington.
Right-click USA_adm1 (layer list) > Remove
You should now only have the Washington state boundary in your project
Zoom to layer: Right-click layer (layer list) > Zoom to Layer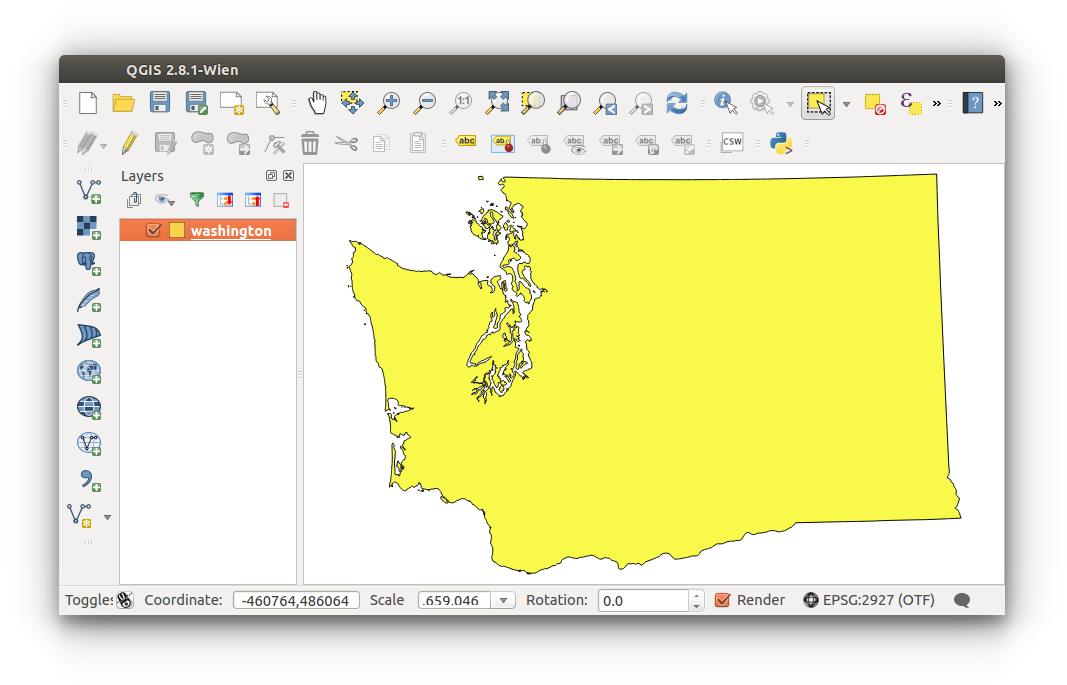
- Import the US northwest GTOPO30 DEM from the iPlant data store (throught iRods):
- iRods access:
/iplant/home/shared/aegis/Spatial-bootcamp/data-hygiene/data-formatting/gt30v140n90_us_northwest.tif
Or download here and Add Raster Layer :
:
gt30v140n90_us_northwest.tif
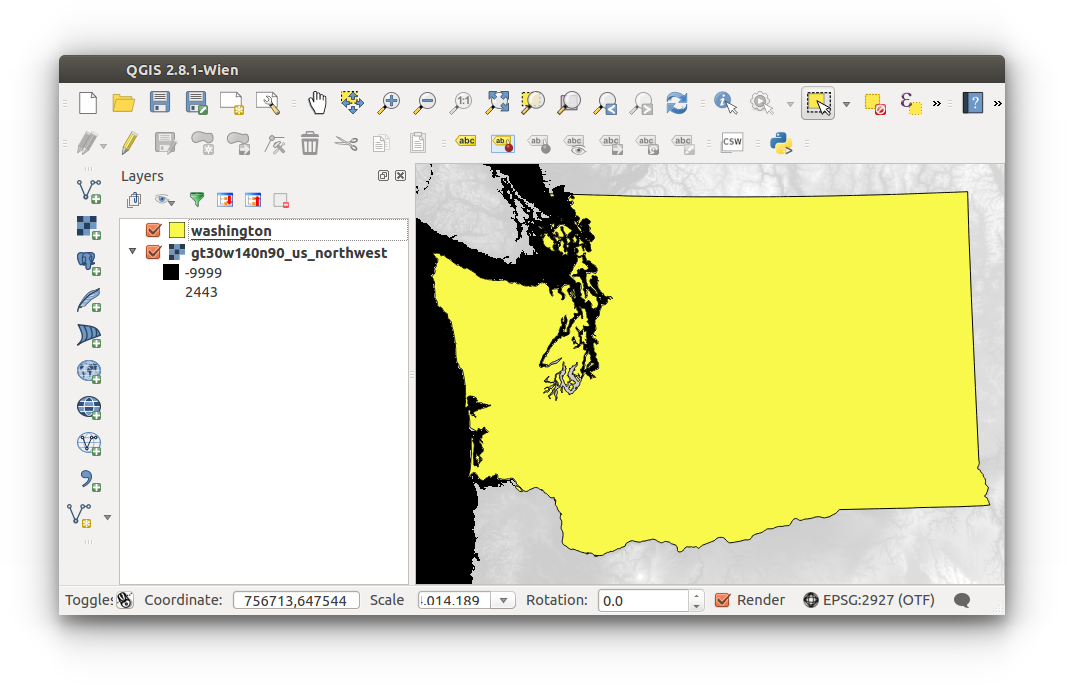
The DEM transforms to EPSG:2927 since we had enabled 'on-the-fly' transformations at the beginning of our workflow. Notice the DEM value -9999, this represents no-data.
Move the washington layer above the DEM from within the layer list: Click-hold-drag washington to the top of the layer list
Zoom to washington layer: Right-click washington (layer list) > Zoom to Layer
We are now visualizing the boundary of Washington on top of an elevation raster
- iRods access:
- Project the DEM to EPSG:2927
We are able to visualize the DEM in EPSG:2927 thanks to our 'on-the-fly' transformation in QGIS. However if we need to store the DEM with EPSG:2927 we must reproject, or warp our raster.
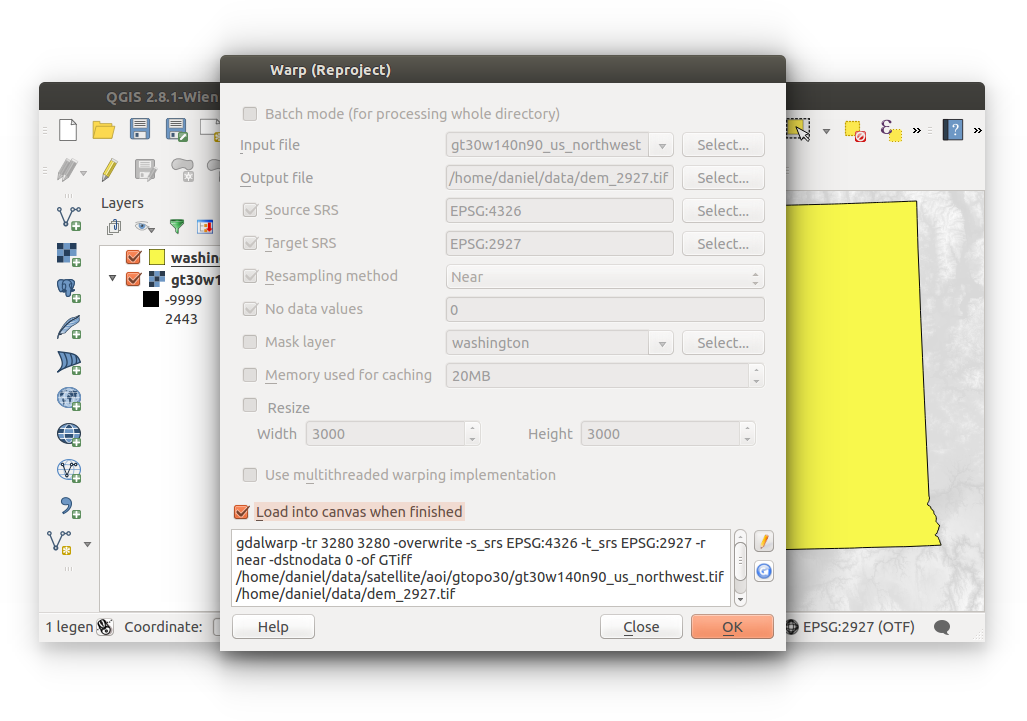
Open the raster Warp (Reproject) tool: Menu Bar > Projections > Warp (Reproject)
Configure the inputs as follows:
- Input file: gt30w140n90_us_northwest
- Output file: dem_2927.tif
- Source: EPSG:4326
- Target: EPSG:2927
- Resampling Method: Near
- No data values: 0
- We need to add a custom parameter into gdalwarp: Target Resolution
By default, GTOPO30 is provided in meters, while NAD83(HARN) / Washington South (ftUS) (EPSG:2927) is in US survey feet. Rasters must have the same resolution for an analysis to be valid.
Next to the code at the bottom of the window, Click the Edit tool icon to enable editing the code:
It's best practice to declare a target resolution so we understand what we're working with. Below, we have calculated feet per kilometer: 3280 feet = 1 kilometer. Even though our projection is in US survey feet, we are still working with kilometers.
Add the following code (see the example below):-tr 3280 3280
Do not disable editing once finished. This will revert changes to the code and our target resolution will not be changed.
Click OK to run the tool, click CLOSE to close the tool.
- Confirm the transformation:
Open a new project, there's no need to save this current project.
Open the reprojected, or warpped DEM
The default projection should be EPSG:2927 (without 'on-the-fly' transformation), assuming everything went well.
You could also measure the pixels with the Measure tool .
.
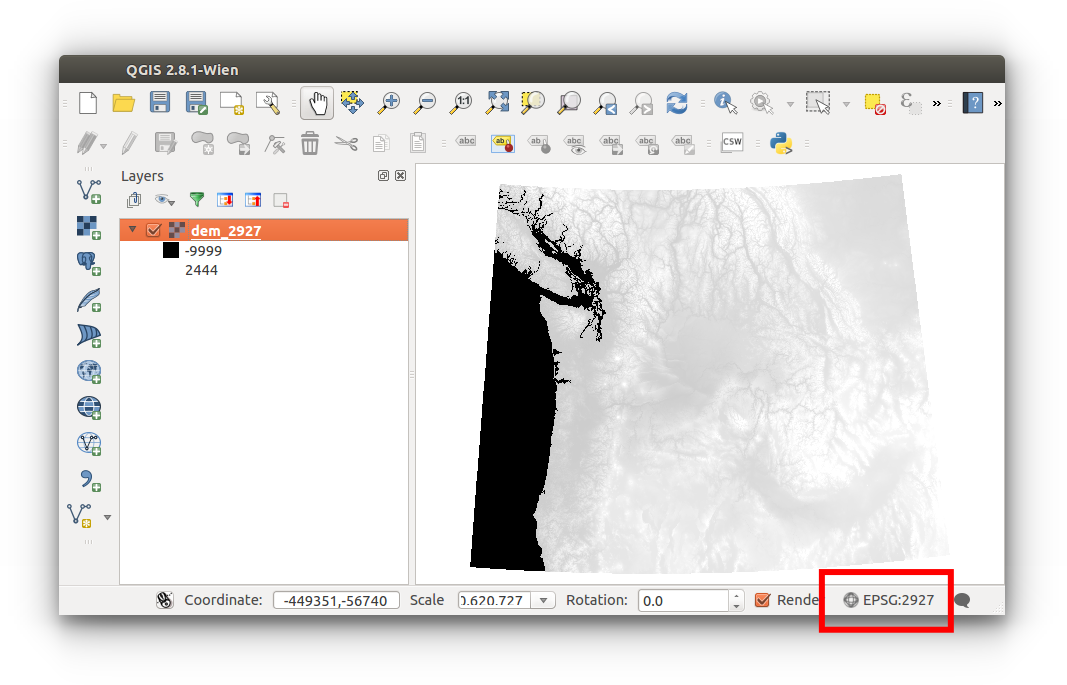
You have just successfully extracted a feature from a shapefile, and warped (reproject) a raster while declaring a target resolution.
dem_2927 will be used in the Landslide Exercise.
Close the project without saving.